
- 131
- 51 658 921
Shake the Future
Spain
Приєднався 18 сер 2010
Hi, I am Denny!
I make DIY videos here on youtube.
I enjoy to coming up with new ideas and sharing them with you.
Feel free to browse the channel. I am sure you'll find something interesting.
Thanks for checking it out!
I make DIY videos here on youtube.
I enjoy to coming up with new ideas and sharing them with you.
Feel free to browse the channel. I am sure you'll find something interesting.
Thanks for checking it out!
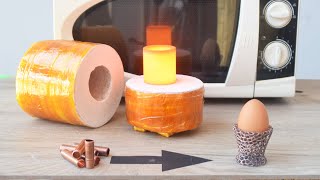
Print-Wave Metal Casting: A Different Approach to Metal melting
The first 500 people to use my link in the description will
receive a one month free trial of Skillshare!
skl.sh/shakethefuture06241
In this video, I demonstrate a new kind of metal casting method.
It's similar to sand casting, but it's not.
We use investment to make moulds from 3D printed objects, but there is no need to do a burnout.
So it can be done without using a kiln.
*Mario's Star* www.printables.com/model/673200-mario-star
*Butter Knife* www.printables.com/model/921205-butter-knife-for-printwavemetalcasting
Переглядів: 15 589
Відео


How I made a ring from Spaghetti Dish Ingredients
Переглядів 1,4 тис.Місяць тому
I took some spaghetti, babybell cheese and tomatoe puree and turned them into a metal ring. ua-cam.com/video/XCI_FPDQA-U/v-deo.html ua-cam.com/video/P1VmIYheuU4/v-deo.html

Metal Casting a Hook with a Microwave
Переглядів 21 тис.2 місяці тому
In this video, I use microwave to do some lost PLA casting. I use my microwave kiln to burn out a plaster mould and to melt some brass. ua-cam.com/video/P1VmIYheuU4/v-deo.html ua-cam.com/video/XCI_FPDQA-U/v-deo.html

Microwave Kilns, Lost Wax/PLA/Resin casting with a Vacuum Cleaner
Переглядів 114 тис.4 місяці тому
*Patreon:* www.patreon.com/shakethefuture This is the second part of the video I published 10 months prior to this one. "Melt Metals in the Microwave | The Ultimate Guide" was the first video. Originally, it was supposed to be one video, but in the end, I split it into two parts. In the video, I show alternative ways to get into metal casting. I demonstrate how to make microwave kilns and how t...

Melting Cast Iron in a Microwave
Переглядів 5 тис.Рік тому
In this video, I turned a toy hammer into a cast iron brass hammer. *Microwave metal melting video*: ua-cam.com/video/P1VmIYheuU4/v-deo.html *Microwave Metal Melting Playlist*: ua-cam.com/play/PLok0Ji2AChTN50l5_AgssgtHvaGR9y80g.html Fluidscape by Kevin MacLeod is licensed under a Creative Commons Attribution 4.0 licence. creativecommons.org/licenses/by/4.0/ Source: incompetech.com/music/royalty...
Melt Metals in the Microwave | The Ultimate Guide
Переглядів 562 тис.Рік тому
*MAKE SURE TO WEAR A RESPIRATOR WHEN WORKING WITH CERAMIC FIBRE AS WELL AS USING THE CHAMBER TO MELT METALS!* There are many things you can do inside of the microwave, but it's not just food heating. Microwave can be used to melt metals. From making your own chambers to making your own crucibles. In this video you'll find everything you need to know to get started with microwave metal melting #...

3D Printed Coffee Filter Air Cooler
Переглядів 3,5 тис.2 роки тому
3D Printed Coffee Filter Air Cooler


Make a Wing Bolt from a Plastic Bottle | #Life Hack
Переглядів 82 тис.6 років тому
Make a Wing Bolt from a Plastic Bottle | #Life Hack
Can You Drill a Hole With a Tin Can?
Переглядів 202 тис.6 років тому
Can You Drill a Hole With a Tin Can?
Is This 20 Years Old Xmas Life Hack Still Relevant in 2018?
Переглядів 7 тис.6 років тому
Is This 20 Years Old Xmas Life Hack Still Relevant in 2018?
If You Use This Pen Drive, It might Explode! Diy Spy Gadget
Переглядів 14 тис.6 років тому
If You Use This Pen Drive, It might Explode! Diy Spy Gadget
Most Ridiculous, but cool Nokia 3310 Mod
Переглядів 32 тис.6 років тому
Most Ridiculous, but cool Nokia 3310 Mod
How to Make a Pump from a Caulking Tube
Переглядів 23 тис.7 років тому
How to Make a Pump from a Caulking Tube
DIY USB Speakers from Glass Bottles
Переглядів 21 тис.7 років тому
DIY USB Speakers from Glass Bottles
Weird Pringles Gadget That You Can Make
Переглядів 43 тис.7 років тому
Weird Pringles Gadget That You Can Make
DIY: Amazing Helping Hand 😆 (April Fool´s)
Переглядів 5 тис.7 років тому
DIY: Amazing Helping Hand 😆 (April Fool´s)
3 Things You Can Make From Aerosol Spray Cans
Переглядів 410 тис.7 років тому
3 Things You Can Make From Aerosol Spray Cans
These Christmas Decorations are made from Light Bulbs!
Переглядів 88 тис.7 років тому
These Christmas Decorations are made from Light Bulbs!
5 Things You Can Make From Leftover Silicone
Переглядів 39 тис.7 років тому
5 Things You Can Make From Leftover Silicone
Must Have DIY Gadget for Busy Tea Lovers
Переглядів 25 тис.7 років тому
Must Have DIY Gadget for Busy Tea Lovers
I made Donald Trump's Gear Knob....
Переглядів 11 тис.7 років тому
I made Donald Trump's Gear Knob....
Start Your Car With a Rope (Dead Battery Life Hack)
Переглядів 7 млн7 років тому
Start Your Car With a Rope (Dead Battery Life Hack)
Diy Halloween Magic Wand that Actually Works
Переглядів 85 тис.7 років тому
Diy Halloween Magic Wand that Actually Works
Awesome Projects, Life Hacks, Innovation, Creativity, Diy's
Переглядів 146 тис.7 років тому
Awesome Projects, Life Hacks, Innovation, Creativity, Diy's
very good, it seems like a good amount of work. But good results
There is some work to do, but I don't find it more time consuming or let's put it this way. The fact that I don't need to do a burnout makes a massive difference. I love it.
@@ShakeTheFuture awesome, I am happy for you. I have been following your channel for a good while and you have come a long way.
Awesome! I don't dare try it on my new printers bed, worried that the plaster will damage it. I have an old printer to sacrifice.
I have never experienced any issues regarding potential bed damage. If the PEI sheet has a hole in it, getting it wet might not be ideal. Other than that, there are no issues, at least with my printer. The only thing to watch out for is bed adhesion to prevent the plaster from leaking out of the mold. This has happened before, but it usually leaks out slowly, so I can just put a paper towel around the leak to stop it. In other words, I haven't covered my printer with plaster due to a major leak. Just have a piece of cloth on hand in case it happens.
@@ShakeTheFuture Okey thanks for the advice. I tried covering an entire print in plaster before but never managed to burn it out completely, this approach looks way easier!
I'm thinking of building a custom microwave so that I can make it larger and have custom controls- such as built in burnout schedules, etc. I had thought that building it with multiple magnetrons might be a fool's errand since the complications due to microwave interference would be difficult to overcome... but it just hit me. What if I made separate microwave chambers that were isolated with aluminum shielding (or built the shielding into the kaowool when I built the furnace) so that there were effectively two or more different microwave chambers that were thermally connected to the main chamber and could contribute heat flow to the main chamber without having to send their microwave radiation there. Perhaps such a scheme could allow for more reliable heating at temperatures required for steel or even titanium. I would make blocks of silicon carbide that are connected by hallways of silicon carbide to the rings of silicon carbide that heat up the central chamber. Essentially, a thermal circuit. The silicon carbide blocks and hallways would be thermally insulated from the exterior as usual by kaowool and kapton tape. Inside the kaowool around the middle of the hallways (separated far enough from the silicon carbide to not melt), I would place aluminum reflectors that would achieve separating the magentrons' EM waves. I guess the whole point of such an elaborate setup would be to ensure that the microwave can run for a long time without overheating the magnetrons. Distributing the load across the magnetrons could allow the microwave to get to a similar temperature with less duty cycle per magnetron. This would make it more reliable overall. Or you could more quickly reach high temperatures. That could be nice too. LOL. Now I'm probably going to have dreams of distributing a thermal circuit in a sphere around the central chamber and pumping in energy from 16 magnetrons. The real problem is plugging them all in. Hahaha.
Well, it's definitely possible. Industrial microwaves have 2 magnetrons. I've never tried them out, but they should melt metals way faster.
At 11:11, it seems like Zamak - a zinc alloy
I just had a thought - they make a wax filament, which would allow you to use a 2-filament printer to make a more complicated cast. Would require a little bit of burnout, but may be easier for some objects than using a full flask process.
I do have 1 spool of wax filament. I never made a video about it, because it's difficult to print and the adhesion in bad. I find that it's much easier (and 3x cheaper) to use PLA. That said, I have not touched the spool in years. Maybe I should give it another shot with Prusa MK4.
The metal is zamak 12, an alloy of zinc, magnesium and copper, used in bathroom fixtures, door handles and other items that require very accurate details. It is known to be one of the best flowing alloys, next to silicon bronze. Also, mold should not be close to pouring temperature, it should be 500F lower than the pouring temp.
Thank you for the correction. I think saying close to pouring temperature was not a good word choice.
@@ShakeTheFuture No foul done, I enjoy the innovative content. You should try casting some stuff with that zinc alloy too and explore its capabilities, I would love to see that.
Your mystery metal in the door handles is probably some form of Zamak which was brass plated. There's a bunch of different kinds but what they have in common is that they are zinc alloys designed for die casting. Melting point is fairly low, and the metal is very fluid so it fills details in the mould well. Hence your nice cast (except for the damage from early opening). Zamak is actually so good that it's worth setting up just to cast it; it has reasonable mechanical properties (superior to cast iron, for example) and easily produces good castings. However it cannot tolerate even the slightest contamination with lead, inclusion of lead in the alloy will cause a form of corrosion which makes the metal break with a strange 'crystalline' appearance or worse crumble into little bits. In fact manufacturers go so far as to distill the zinc to obtain sufficient purity to make good Zamak. This would be a problem if you used the same crucible and tools for Zamak as for brass, as brass often contains 0.5% or so of lead as a machinability aid.
Thanks! That's some good info. I'll need to buy some zamak ingots and explore it a bit more. Cheers!
Brilliant 👏 🎉❤
Chewers!
Me
This is why I still love the internet
Excellent work. 👍
Thank You!
Thank you for this video. Seriously. I've been considering how best to make a mold for some things I want to make, using many materials, but often using 3d printing to help create the mold itself, but I haven't been able to figure out which way to go about it for reliable and reusable results. This seems like the best method so far.
I am glad you found it useful. Cheers!
I would run the printer bed at higher frequency shorter motion to get a better and faster bubble removal.
Yes, I actually do use different g-codes. That was one of the early-trial g-codes. Now I run it at shorter distances. Cheers!
I'd heard of glass melting in microwaves, but never metal and would never have dreamed you can melt cast iron in a microwave. It is not practical for most of what I want to do but I have designed a chess set that would be awesome in cast iron and cost too much to have cast for me
What a truly inspirational video. Like all great ideas, they are so obvious once you are shown it. I have just started putting together the necessary items to build my own metal melting workshop. I have spent hundreds of hours watching videos and reading articles and no one comes close to how you do it.
Thank You for taking time to leave a comment. It's always nice to know that the people found the video/information useful.
This is incredible! The mold process, the melting process, the information... What a great channel, thank you!
Thank You very much for taking the time to leave the comment.
Nice!
Cheers!
How about the weakness of the moulds with the gypsum in it it tends to turn yellow and break easily if you fire it in a kiln. And if you don't fire it in a kiln the water moisture is still in the mould enough to cause defects on the castings when metals as hot as bronze containing copper are poured in? What are your ratios of the investment? Am I right in saying that this is better for smaller objects? And what type of build plate surface do you use so the plaster does not mess up the bed surface for the next print?
Obviously, this is just general information. There are different kinds of investments that can be used. The start was cast using "unicast prestige" investment, and the knife using Plaster of Paris. The "proper" investment was mixed according to the manufacturer's recommendations. Sometimes I add some sand, but I'm not sure if I did this time. I mixed the Plaster of Paris in a 1 to 1.2 ratio; for example, 200g of water to 240g of plaster. That said, not all Plaster of Paris products are the same, so the ratios can vary from manufacturer to manufacturer. I have not yet cast any copper using this method, but I am about to do so as I write this. I am just making more molds so I can dry them all in the oven together. I would not cast copper in Plaster of Paris, even though I have done it using the Lost PLA method with quick-cooling casts like the egg cup shown at the end of the video. Those work pretty well. I know that in general, it's assumed that you need a kiln to get rid of the water in the mold, but in my experience, that's not always the case. Sure, for professional casts and perfect results, you'll want to do everything by the book. I definitely recommend it. That said, I can get pretty good casts using this method, and *I'll have more videos showing it* My oven can go up to 250°C, and I turn ON the fan. I think the fan really helps... like really helps. As I said in the video, there might be investments that will require kilns for sure, so it's all about trial and error. If one does not feel comfortable trying it out, then don't! I am not responsible for anything that can go wrong. As long as you dry your molds properly and wear PPE, you'll be fine. And if you find that your molds are still wet (after hours of drying) or casts come out bad, then you know that your oven can't do it. End of the game. I always dry my molds in the oven for at least 4 hours (or more depending on the size and temperature), and I make sure that the temperature of the molds is close to 250°C. Let's put it this way: if your oven can reach 250°C and your molds are way off that temperature, you know they are still wet. It's fine if they are hotter (since oven thermostats tend to overshoot), but if the mold has only reached 220°C in an oven that can reach 250°C, then you know it's still wet. It will also depend on the air fryer/oven you're using. My air fryer struggles to bring the molds to 205°C (the maximum temperature it can reach), so I always switch to the oven. I personally get the best results casting copper using Ultracal/Hydrocal products. I have not tried "unicast," but I suppose it should also work. I wouldn't know about casting large items, as my casts are generally pretty small anyway, so nothing has changed compared to Lost PLA casting. I just use the original Prusa PEI sheet build plate that came with the printer. It does not have any texture, which I think helps. I have not had any issues with the build plate. The investment does not affect it as far as I am aware. The mold can be removed easily. Sometimes I just go slow to avoid pulling out the print from the mold. If it's a print that is properly embedded into the investment, I just remove it from the build plate as I would a normal print. *For anyone who finds it useful* : If this video has inspired you to buy a 3D printer, you need a modern 3D printer with a "perfect" first layer, such as the Prusa MK4 or Bamboo printers. That way, you'll get the best results. I would avoid getting older generation printers that do not lay-down a perfect first layer automatically. It will make things more frustrating and complicated
Add salt to your plaster to speed up the curing time. You can get it to set within minutes, depending on the amount of salt. (A great tip that I got from a dental prosthetic maker)
Thanks for the tip. I'll try it out!
I think an accelerometer testing g-code would be great for popping bubbles of various sizes, as it passes through a huge range of frequencies.
great idea
The g-code shown in the video is not the only one I use. I have much shorter-faster moving g-codes that do the shaking. You suggestion using accelerometer testing g-code is great. Cheers!
Now I am wondering if this could be used for some kind of injection molding of plastics.
I am sure there is a way it can be used. I also do the same method for making silicone molds. Instead of pouring investment, I pour silicone.
Should cast yourself a real set of crucible tongs
I agree!
The gun parts printing crowd is going to flip out when they see this.
that might be true, sadly...
THE most significant use for 3D printers i have seen since 3D printers became an affordable thing.
John Heisz just added a 3d printer to his wood shop. Check out what he’s been doing with it. I tried sharing link to his channel but I guess it got deleted.
Cheers!
I wish i could super like this video
Thank You! You already did, just by taking time to comment. Much appreciated.
I"m just sitting here in my underpants saying "holy shit" repeatedly. Incredible. One of the most integral processes to modern humans industrialization has just been meaningfully iterated. so smart to recognize the application of the microwave.
Imagine the advantages that smooth glass heat-bed could add to that... The mating of the plaster-halves would be even more precise.
🤔 This is fascinating, but... This method seems like it will still cost a lot of time and money to get going and get the practice down. To spend so much effort might not be worth it for making a few small parts, it will have to be a dedicated hobby or extra income. To cast 2 or 3 things, it would be less expensive to pay someone who already does casting as a hobby.
Here is a trick for knowing when the plaster is dry. After drying it, let it go to room temperature, then place your hand on the surface. If it feels cool, it's still moist. If it feels warm, its dry. (If it is dry it will feel warm even at room temperature). We use this trick all the time making ceramics.
Thank You for sharing the trick. Do you think it also applies to very small/stubborn quantities of water?
@@ShakeTheFuture yes, as long as there is moisture. It's critical in ceramics, so the pieces don't explode in the kiln.
btw if you need higher temperatures, get a broken toaster oven for free, a kiln coil and pid controller for 10-15 bucks each, and a bag of refractory concrete for 5-10 bucks. you can add insulation around to make it more efficient (and reach higher temps) too.
Thanks for the tip!
The other metal is most likely zamak (mostly zinc and aluminium)
The second doorknob was probably Zamak: en.m.wikipedia.org/wiki/Zamak
This is amazing! Why didn't anyone popularize it earlier!
Thanks!
This is a good idea however you DO need w kiln to dry it. Some of the water is locked in the plaster and will not be driven off until you can get it above 600F and keep it there. Most ovens do not get hot enough. Sometimes you will get lucky and it will work without a kiln, but eventually you’ll have one blow up in your face. Do not even attempt this without an apron and a face shield.
well, since it worked, evidently you don't (i.e. it doesn't matter if there's a bit of moisture left) though yeah you shouldn't tempt fate. I think the easiest solution (depending where you live) is to just get a pyrolysis oven, which will do 400C+ in cleaning mode. or make a crude kiln with refractory cement, a pid controller and some kiln coils if pyro ovens aren't common where you live.
@@satibel working doesn’t necessarily mean the mold is dry. It means that the geometry of the mold was not such that the escaping water was confined enough to make a bubble blow molten metal in your face.
Thanks for the info. Yes, wearing a PPE is a must!
This is a super cool technique. Great video.
Cheers!
Zinc, or some zinc alloy, from my experience in the foundry industry. When I worked for National Zinc Processors, we would see all sorts of spouts and handles come in for recycling. Awesome work as always and looking forward to your channel growth.
Thank You!
Fantastic idea!!
Thanks!
my guess for your non-brass is ZAMAK/Zamac. easy to cast, low melting point around 400°C, good surface finish, strong enough for most uses
Thank You! It's good to know.
This is sweet thanks a lot! Shaking the investment on the printer for shorter distances and at higher frequency, rough guess like 60 hz, (think input shaper calibration) might get more bubbles out
That was the first G-code I used. It also traveled a shorter distance at some point during the 2-minute shaking. However, I recently changed the G-code to begin using shorter distances right from the start just like you suggested. Indeed, it's better that way 👍 Cheers!
Where do you source metal? A friend gave you the door handles, but what about the rest?
Last time I bought 8mm aluminium rope-crimps from AliExpress (around 1kg). They are a good size for my crucibles, and it worked out to be quite cheap. Next time, I'll get some ingots from AliExpress or somewhere else. Since I live in an apartment, it's not very convenient for me to cut metal to fit into the crucible, so I prefer to buy smaller pieces of metal, like cable-crimps or ingots. For brass, I just buy some pipe fittings from the local hardware store. For copper, I buy some copper pipes and cut them with a pipe cutter. That's my favorite way to cut metal to size. For cast iron, I just buy 0.5-1 kg weight plates. I have a lot of 1 kg weights in stock from my failed bodybuilding days :) I recently bought a 0.5 kg weight plate from a sports shop and was surprised at how cheap it was. It was under 2 euros. It's one of the cheapest metals and it casts beautifully, but it is a pain to cut it into smaller pieces. I usually make a cut with the saw and then go outside and break the plate with a hammer.
Interesting idea but it will only work for a pattern that can be withdrawn with the necessary draft so I see no advantage over sand casting which is much quicker and an indefinite number of castings can be made from one pattern.
I agree that sand casting is much quicker and less wasteful, but there are some advantages to other methods that I'll demonstrate in future projects, such as the dice example at the end of the video. That said, I have never done sand casting, so I might not know what I am talking about 😊 Thanks for the comment!
With the pattern softened for removal I don't see this method limited to sand casting draft requirements. On the other hand, if drafting is satisfied a pattern might be reused.
"Brass" .. finds aluminium bronze
Is that's what it is? Aluminium bronze?
@@ShakeTheFuture Looked up the melting temps: brass: 930°C (1710°F); Aluminum Bronze*: 1027-1038°C (1881-1900°F) There are different alloys, but when obtaining "brass" from scrap metal (especially door handles that are more ornamental), you may well encounter Al bronze.
Very clever!
Thank you!
This is a great idea. You can even do it with non drafted things. Im def going to try this! Tyvm sir!
Cheers!
Even limited undercut if my guess is right.
Any chance pulling a vacuum on plaster may improve drying without heat.
Honestly, I have no idea, but what I do want to try is leaving the wet mold in the car. Since I live in Spain and it's summertime, I might cut down on my electrical bill 💰💰💰
I love seeing new and innovative ideas, but isn't this much more expensive and wasteful than typical sand casting?
Well, it's not better or worse, it's just different, and yes, it is more wasteful indeed. Of course, with sand casting, you don't need to use an oven and the sand can be reused. However, this method is great if you want to do some metal casting as a busy person, assuming the files are provided by the community. It doesn't take a lot of time, I mean YOUR time. Also as I mentioned in the video, with this method you can cast items that would be impossible or difficult to cast using sand casting. Cheers!
@@ShakeTheFuture I'm looking forward to seeing the dice video
Great video. Thanks for making it.
Thank You Marc!
Neat technique! I saw you patiently sanding with a Dremel. Bosch makes a cute 12V cordless die grinder that’s great for shaping and polishing metal parts. So satisfying.
Thanks for the suggestion.
I totally didn't know you could just melt any pla in a microwave like that. Very cool. Any caveats I should know about?
Thanks! I'll be making another video with more examples of this method. I'll demonstrate how it's possible to do a bit more complicated casts.
If you're going to use that knife, you'll want to test it for lead content. The white metal is a zinc alloy, like zamak.
Thank You for the tip! 👍
Can you use metal powder so you do not have to pour hot metal. Like sintering.
Yes, you can sinter using the microwave, but I have not done it myself. There are some people doing it on UA-cam.